
How to Mount a Projector Without Drilling
Mounting a projector without drilling offers numerous benefits. It preserves the integrity of your walls and ceilings while ensuring optimal image placement and quality. Traditional wall mounts and ceiling-mounted brackets can be invasive and leave permanent marks.
However, alternative methods, such as using a projector shelf, adhesive hooks, or tension rods, provide a noninvasive solution. These methods maintain the aesthetic of your living or workspace and offer flexibility for both temporary and permanent setups.
Additionally, with proper keystone correction, you can achieve a perfectly aligned display without the hassle of permanent installations. Discover how these innovative approaches make mounting your projector an effortless and damage-free experience.
Benefits of Mounting a Projector Without Drilling
Mounting a projector without drilling offers several benefits, making it a popular alternative to traditional methods. First and foremost, avoiding drilling helps maintain the integrity of your walls and ceilings. This is especially important if you are renting or do not want to damage the structure of your home or office space. Using non-invasive methods, you can easily remove or reposition the projector without leaving any permanent marks.
This approach preserves the aesthetic of your space and offers flexibility for both temporary and permanent setups. For those who frequently move or rearrange their living or workspace, mounting a projector without drilling allows easy adjustments without hassle.
Moreover, unlike traditional mounts, these innovative methods offer cost savings as they do not require additional tools or hardware. You can use everyday items such as adhesive hooks or tension rods to create a stable and secure mount for your projector.
Lastly, with the help of keystone correction technology, you can achieve a perfectly aligned display without the need for permanent installations. This means you can easily adjust the angle and position of your projector to get the best image quality without causing any damage to your walls or ceilings.
How to Mount a Projector Without Drilling: Step-by-Step Guide
Now, we tell you three methods to mount a projector without drilling.
Necessary Tools and Materials
Regardless of the method you choose, there are a few essential tools and materials that you will need:
- A projector shelf, adhesive hooks, or tension rod (depending on your preferred method)
- A level to ensure proper alignment
- A measuring tape to measure the distance between the projector and the screen/wall
- A pencil to mark the placement of the mount
- Depending on your projector's weight and size, you may need additional support, such as double-sided tape or heavy-duty adhesive strips.
Method 1: Using a Projector Shelf
One of the simplest and most convenient ways to mount your projector without drilling is using a projector shelf. This method involves placing a platform or shelf next to your screen or wall and positioning the projector.
Step 1: Measure and Mark the Position for Your Shelf
First, measure the distance between your screen or wall and where you want your projector to be. Make sure this distance is within the throw distance range of your chosen projector model. Use a pencil to mark this position on the wall or ceiling.
Step 2: Choose Your Platform
Next, choose a suitable platform for your projector. This can be a sturdy shelf, table, or even plywood. Ensure the platform is strong enough to support the weight of your projector and any additional devices you plan to connect.
Step 3: Position and Secure Your Platform
Place your chosen platform at the marked position on the wall or ceiling. Use adhesive strips or hooks to securely attach it to the surface without damaging it.
Step 4: Place Your Projector on the Platform
Carefully place your projector on top of the platform, making sure it is stable and level. Adjust as needed until you achieve your desired image placement.
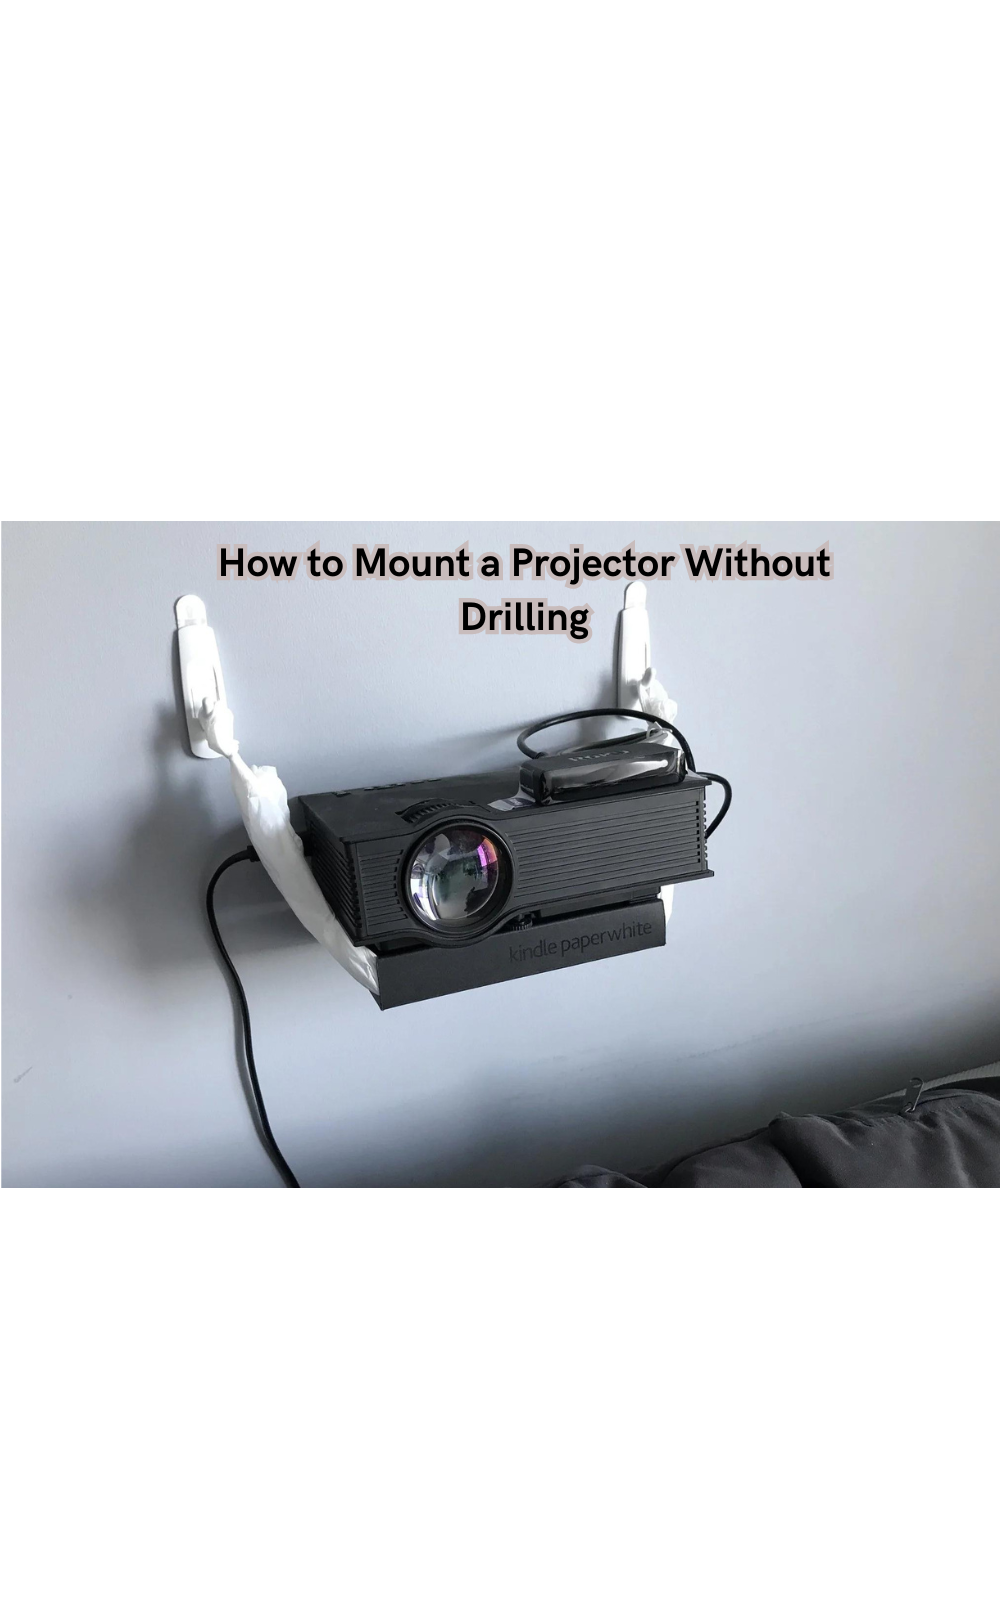
Method 2: Using Adhesive Hooks
Another non-invasive method for mounting a projector is by using adhesive hooks. This approach involves attaching hooks to your wall or ceiling and hanging the projector from them.
Step 1: Measure and Mark the Position for Your Hooks
Similar to the first method, measure and mark the distance between your screen or wall and where you want your projector to be. Use a pencil to mark these positions on the surface.
Step 2: Choose Suitable Adhesive Hooks
Choose heavy-duty adhesive hooks that can support the weight of your projector. Make sure they are suitable for use on walls or ceilings, depending on your chosen installation location.
Step 3: Attach the Hooks
Following the instructions provided with the hooks, attach them to the marked positions on the wall or ceiling. Make sure they are securely attached and can support the weight of your projector.
Step 4: Hang Your Projector
Carefully hang your projector from the hooks, making sure it is at a suitable height and distance from your screen or wall. Mount projector cables and cords neatly to avoid any accidents.
Method 3: Using Tension Rods
Tension rods offer a versatile solution for mounting a projector without drilling. These adjustable rods use tension to stay in place between two surfaces, providing a stable and non-invasive mount.
Step 1: Measure and Mark the Distance Between Two Surfaces
Measure the distance between two suitable surfaces such as walls, bookshelves, or cabinets where you can place your tension rods. This distance should be within the throw distance range of your projector.
Step 2: Choose Your Tension Rods
Choose sturdy and adjustable tension rods that can support the weight of your projector. You may need multiple rods depending on the size and weight of your projector.
Step 3: Install the Tension Rods
Install the tension rods between the two surfaces, making sure they are securely in place. Adjust as needed until you achieve a stable mount for your projector. Manufacturer's instructions may vary, so make sure to follow them carefully.
Step 4: Position and Mount Your Projector
Carefully place your projector on the tension rods, making sure it is stable and level. Use a level to help you achieve proper alignment. Adjust as needed until you get the desired image placement.
Whether you choose to use a shelf, adhesive hooks, or tension rods, these methods provide convenient and damage-free options for mounting a projector without drilling.
Tips for Ensuring Stability and Safety
Here are a few additional tips to ensure the stability and safety of your non-invasive projector mount:
- Regularly check and adjust the mount to make sure it is stable and secure.
- Avoid overloading the mount with too much weight.
- Use additional support such as adhesive strips or double-sided tape for added security, if necessary.
- If using tension rods, make sure they are securely in place and not at risk of falling.
Alternatively projector lift mechanism allows for a hidden installation and provides easy access to the projector, without the need for drilling. This is a great option for those who want a clean and seamless look in their space.
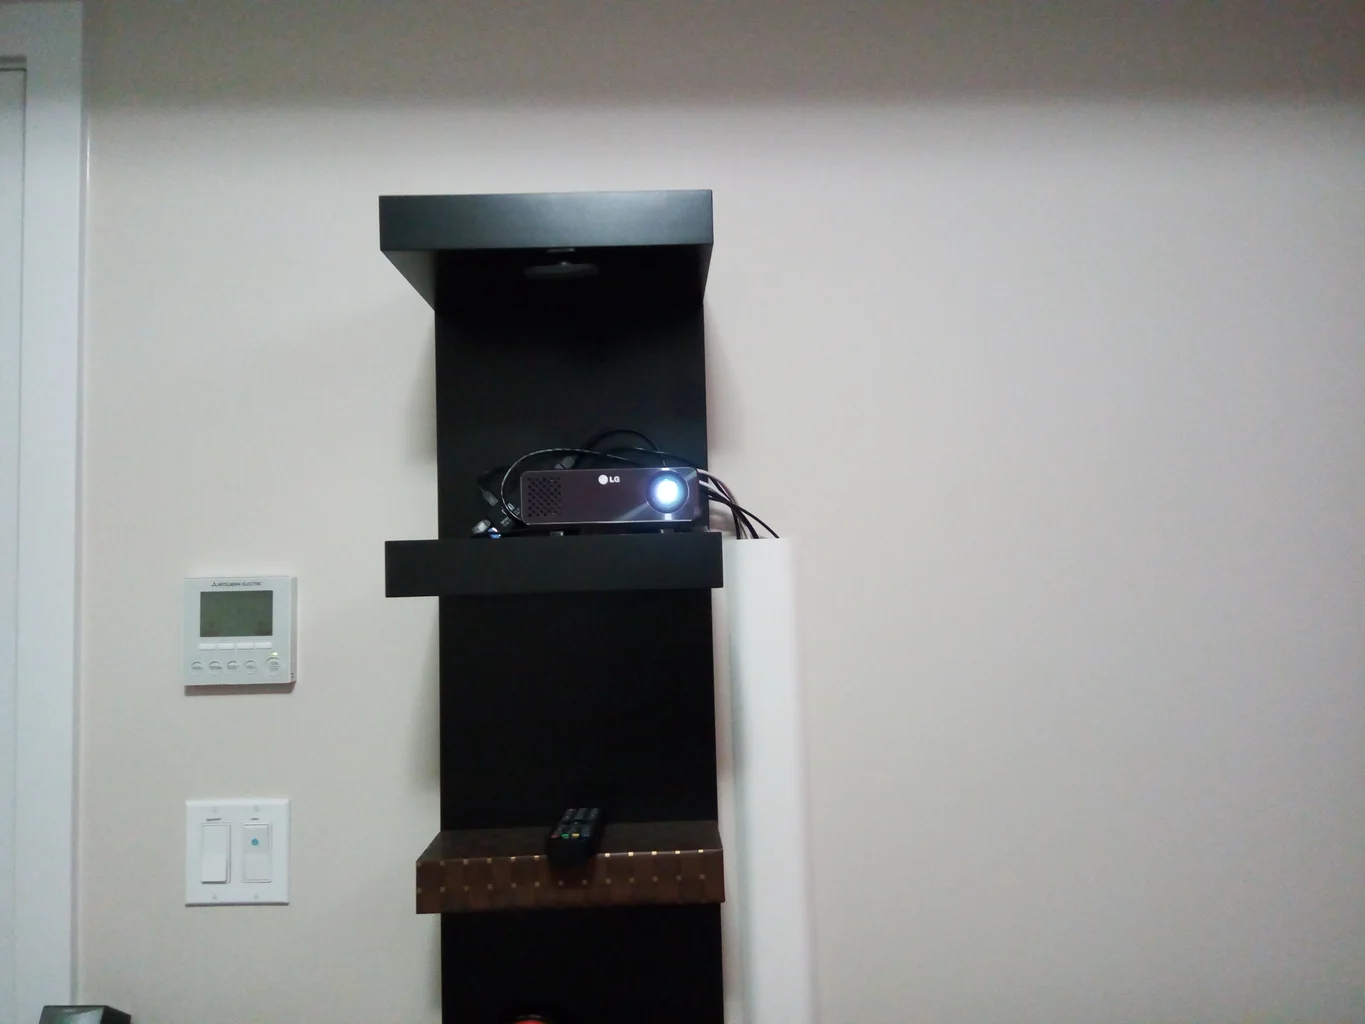
Additional Methods for Mounting a Projector Without Drilling
When it comes to mounting a projector without drilling, there are several creative approaches that can provide a stable setup without damaging your walls or ceilings.
One such method involves using furniture or existing structures to support the projector. For instance, a sturdy bookshelf or cabinet can serve as an effective projector wall mount, ensuring it is at the correct height and angle for viewing.
Another versatile solution is employing retractable screens. Unlike traditional projector screens, retractable screens can be extended when needed and retracted when not in use, saving space and maintaining the room's aesthetics. This method, combined with a strategically placed projector, can create an optimal viewing experience.
Proper cable management is essential for your projector setup's safety and functionality. You can connect your projector to various media sources using HDMI cables and video cables without the clutter of tangled wires. Cable management clips and channels can help keep these cables organized and out of sight, contributing to a clean and professional look.
By utilizing these additional methods, you can achieve an optimal viewing experience that is both flexible and non-invasive, preserving the integrity of your walls and ceilings.
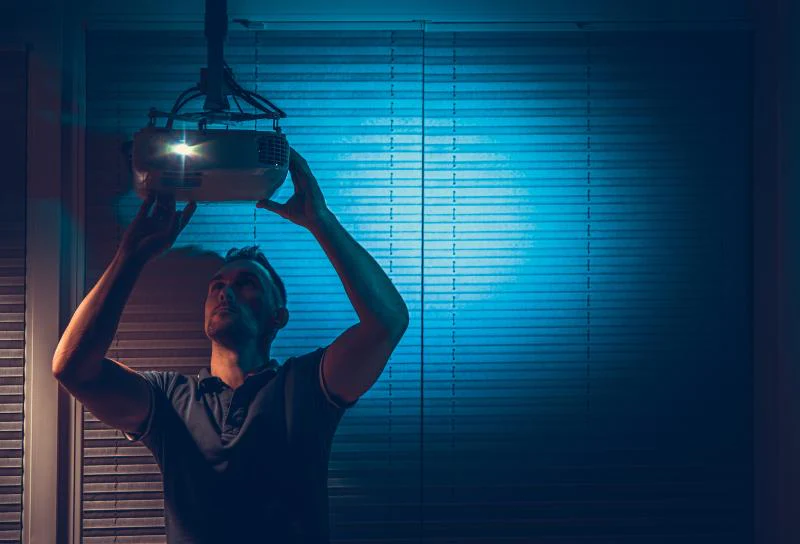
Why Ceiling Mounting May Be the Best Option
While non-invasive methods offer a convenient and damage-free way to mount your projector, ceiling mounting may still be the best option for optimal viewing. Here are some reasons why:
- Ceiling mounting allows you to achieve the desired throw distance more accurately than other methods.
- It keeps the projector out of the way, providing a clutter-free space for other activities.
- Ceiling mounts often come with adjustable arms or brackets, allowing for easy adjustment of projection angle and height.
- It offers better ventilation for your projector, preventing overheating and prolonging its lifespan.
Ceiling mount installation may require drilling, but with proper techniques and tools, you can minimize damage and achieve a secure and stable mount. Additionally, hiring a professional for the job can ensure an expertly installed ceiling mount without any mishaps or accidents.
How to Clean and Maintain Your Projector Mount
To keep your non-invasive projector mount in good condition, regular cleaning and maintenance are essential. Here are a few tips to help you keep your mount clean and functional:
- Regularly dust the mount with a soft cloth or duster to prevent the build-up of dirt or debris.
- Use a mild cleanser and water solution to wipe down any areas that may have accumulated dirt or grime over time.
- Check for any loose screws or components and tighten them as needed to ensure stability.
- If using tension rods, check their tension regularly to make sure they are still secure.
By following these simple steps, you can maintain the integrity of your projector mount and prolong its lifespan, ensuring a smooth and enjoyable viewing experience for years to come.
FAQs
How stable and secure are non-drilling projector mounting methods?
Non-drilling projector mounting methods, such as using adhesive hooks, tension rods, or projector stands, can be very stable and secure when installed correctly. These methods are designed to support the weight of the projector and maintain its position.
Can I use a retractable screen with non-drilling mounting methods?
Yes, you can use a retractable screen with non-drilling mounting methods. The key is to ensure that the retractable screen is securely mounted and the projector is positioned correctly to achieve the desired image placement.
How does lens shift help in achieving the perfect image alignment without drilling?
Lens shift is a feature that allows you to adjust the position of the projected image horizontally and vertically without moving the projector itself. This can be helpful in achieving the desired image placement without having to drill new holes for the mount.
Are non-drilling methods compatible with all types of projector screens?
Non-drilling mounting methods are compatible with various types of projector screens, including fixed-frame screens, pull-down screens, and retractable screens. These methods provide a versatile solution for different setups, ensuring an optimal viewing experience regardless of the type of projector screen you use.
Conclusion
Mounting a projector without drilling offers numerous benefits, preserving the integrity of your walls and ceilings while achieving optimal projector placement.
Non-invasive methods such as adhesive hooks, tension rods, and projector stands provide versatile and convenient solutions for both temporary and permanent setups. Regular checks ensure stability and safety, making these methods reliable for long-term use.
By exploring these innovative approaches, you can enjoy a hassle-free and damage-free projector setup, delivering a great viewing experience without needing permanent installations. Embrace these solutions for an effective and aesthetically pleasing projector mounting experience.